Timing belt replacement – Lotus Excel SE (1986 with round
tooth belt and eccentric tensioner)
I have updated this after changing my cambelt. So you know it can be
done!
Click on the pictures to get a bigger version.
If anyone has any comments/suggestions please email
me: steve at benani dot com
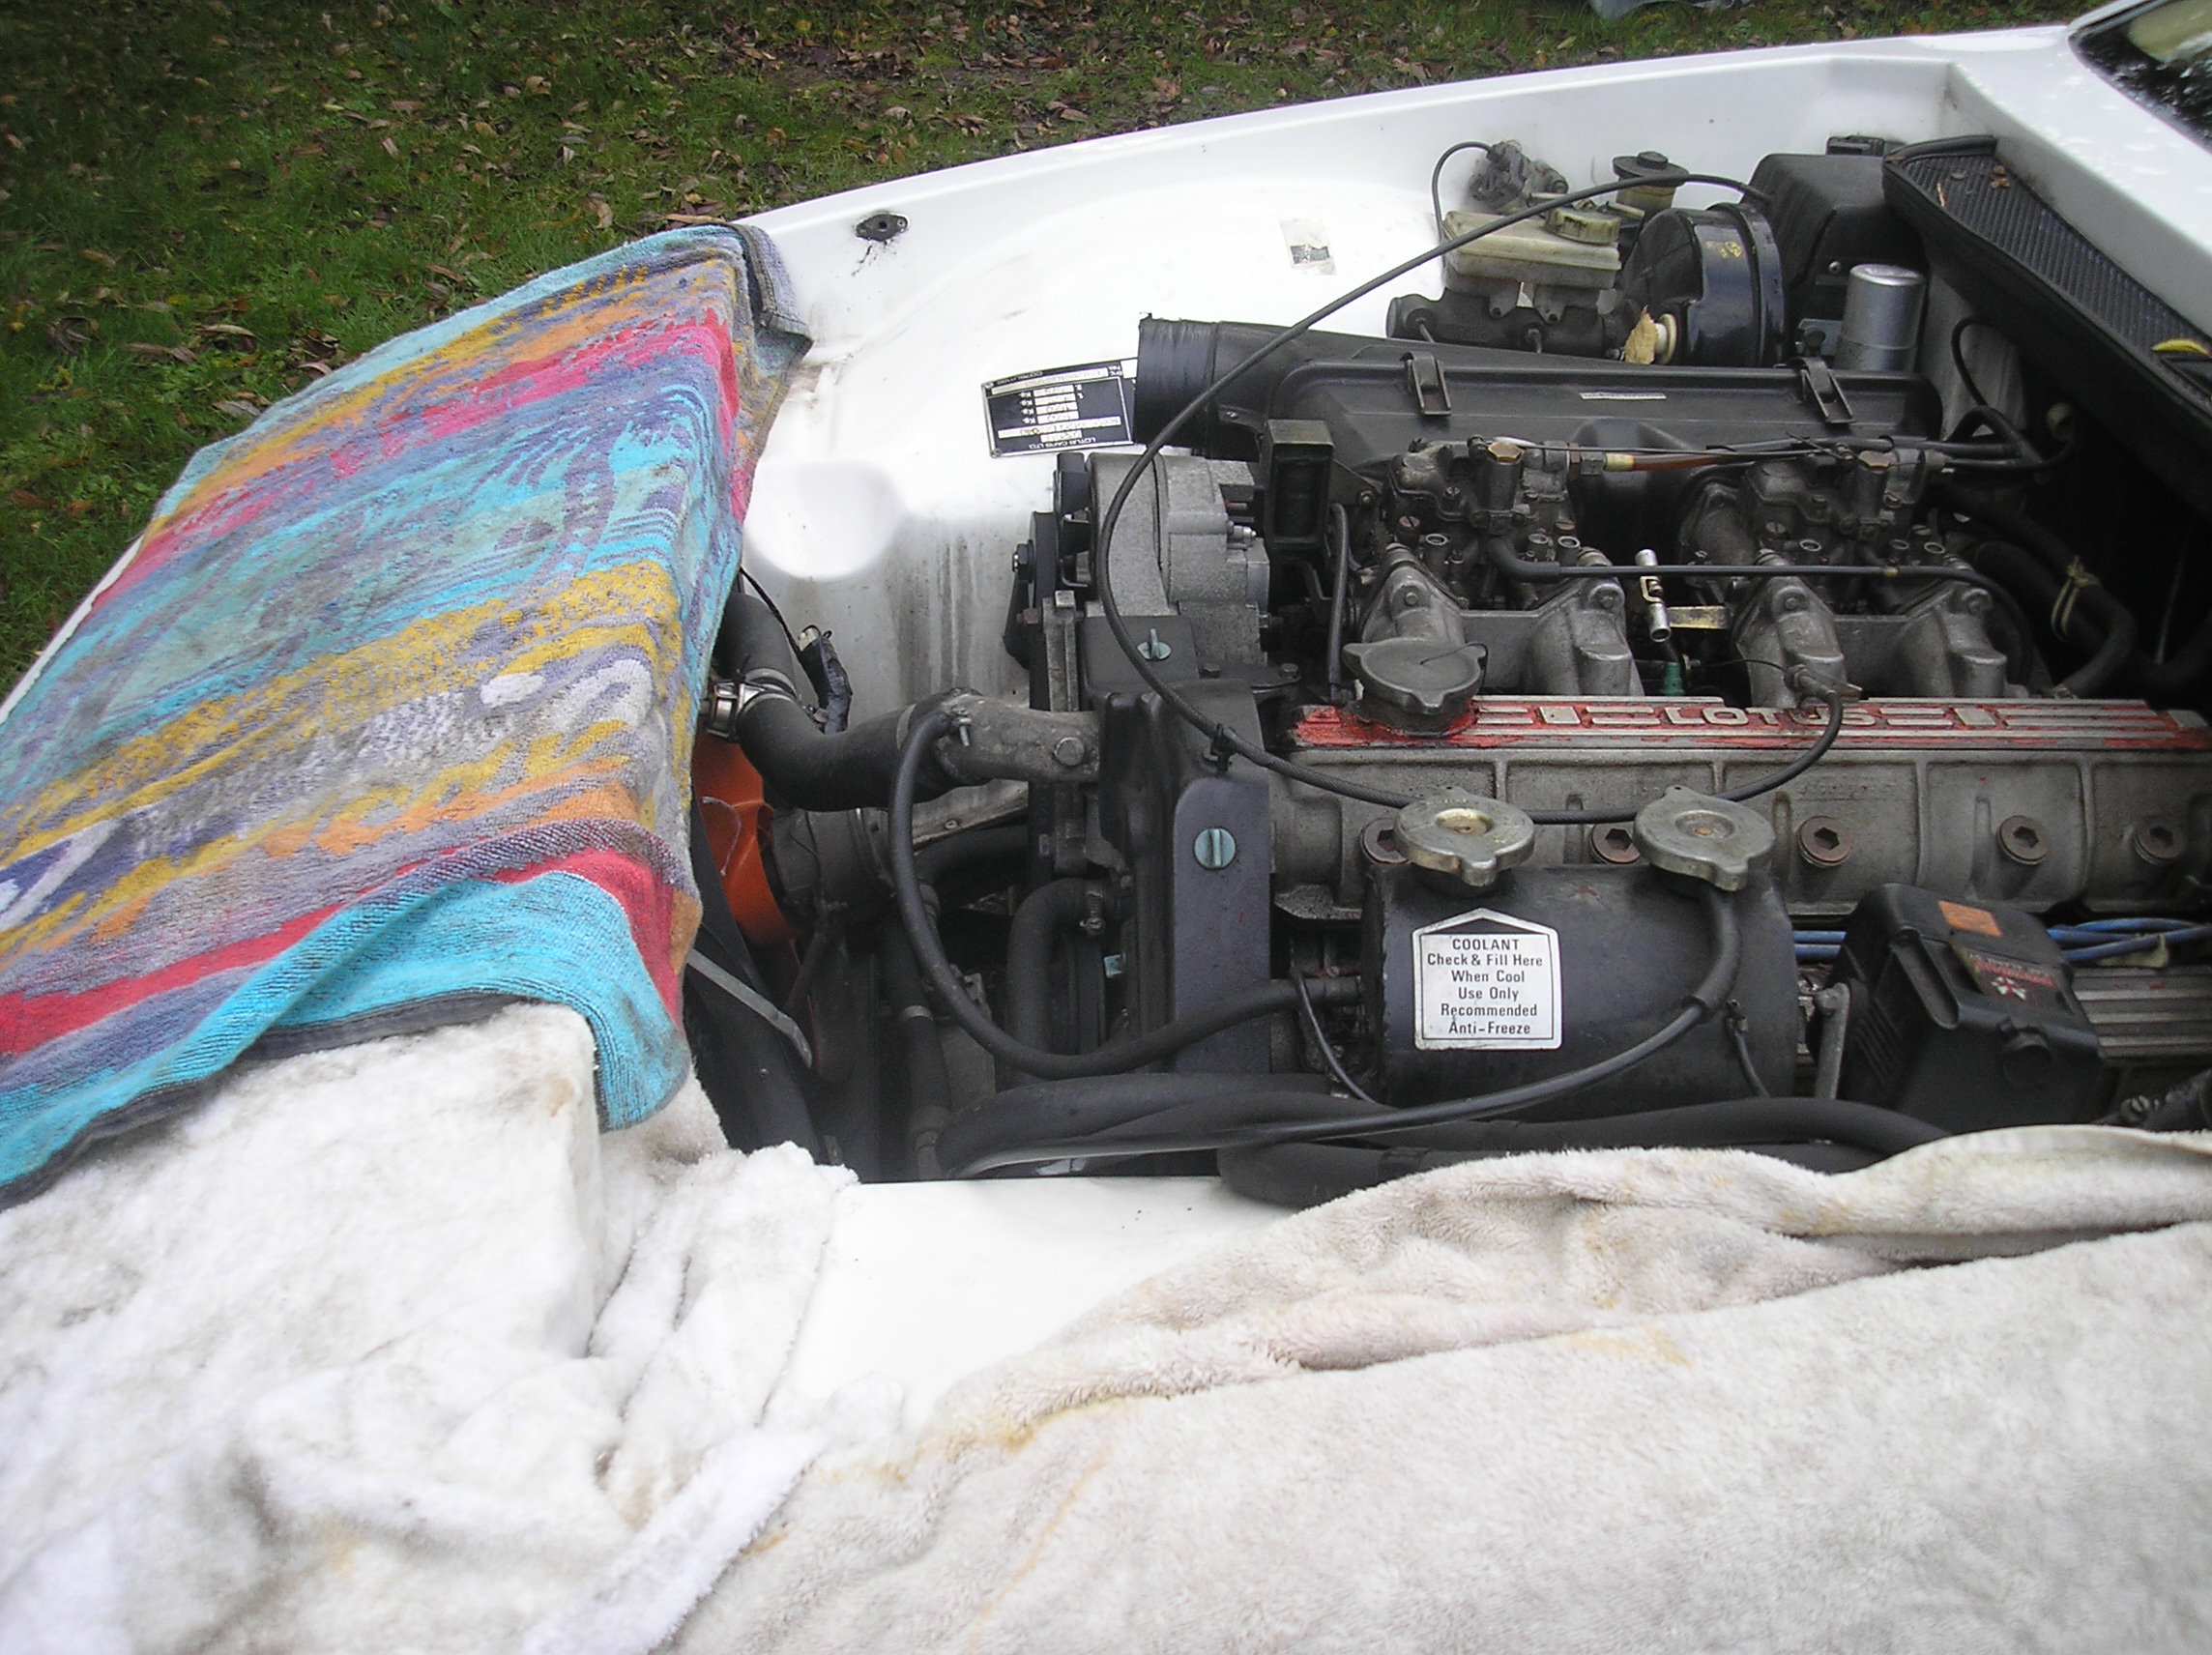
1. Disconnect battery - just for safety.
Remove bonnet – undo & remove bonnet
earth strap, windscreen washer pipe, disconnect gas strut, undo
locknuts (10mm), withdraw
(using M4 Allen) M8 x 50 pins.
* On my
car the 'bolts' are 8mm
and need a 13mm spanner to undo the lock nut and a 4mm allen
key
to remove.
I would recommend a 1/4
drive ratchet as they are quite long!
Now you can get at everything so much easier.
*Cover wings and front panel with cloths
to protect
paintwork. I always put a good coating of
polish and
don't wipe it
off then cover with old towls.
2. Remove air inlet trunk (flat screw on
jubilee clip and cut securing cable ties).
3. Remove upper and lower timing belt
covers –
undo twist lock fittings 90° and withdraw carefully. Remove
belt
cover supports where fitted. Turn the engine by hand in neutral so that
you have a ‘feel’ for resistance. If needed,
slacken /
remove spark plugs for easier turning.
* Top
belt cover has throttle
cable held to it by a clip, just pull the cable out. I would recommend
removing the spark plugs it make it so much easier to
turn the
engine over by hand.
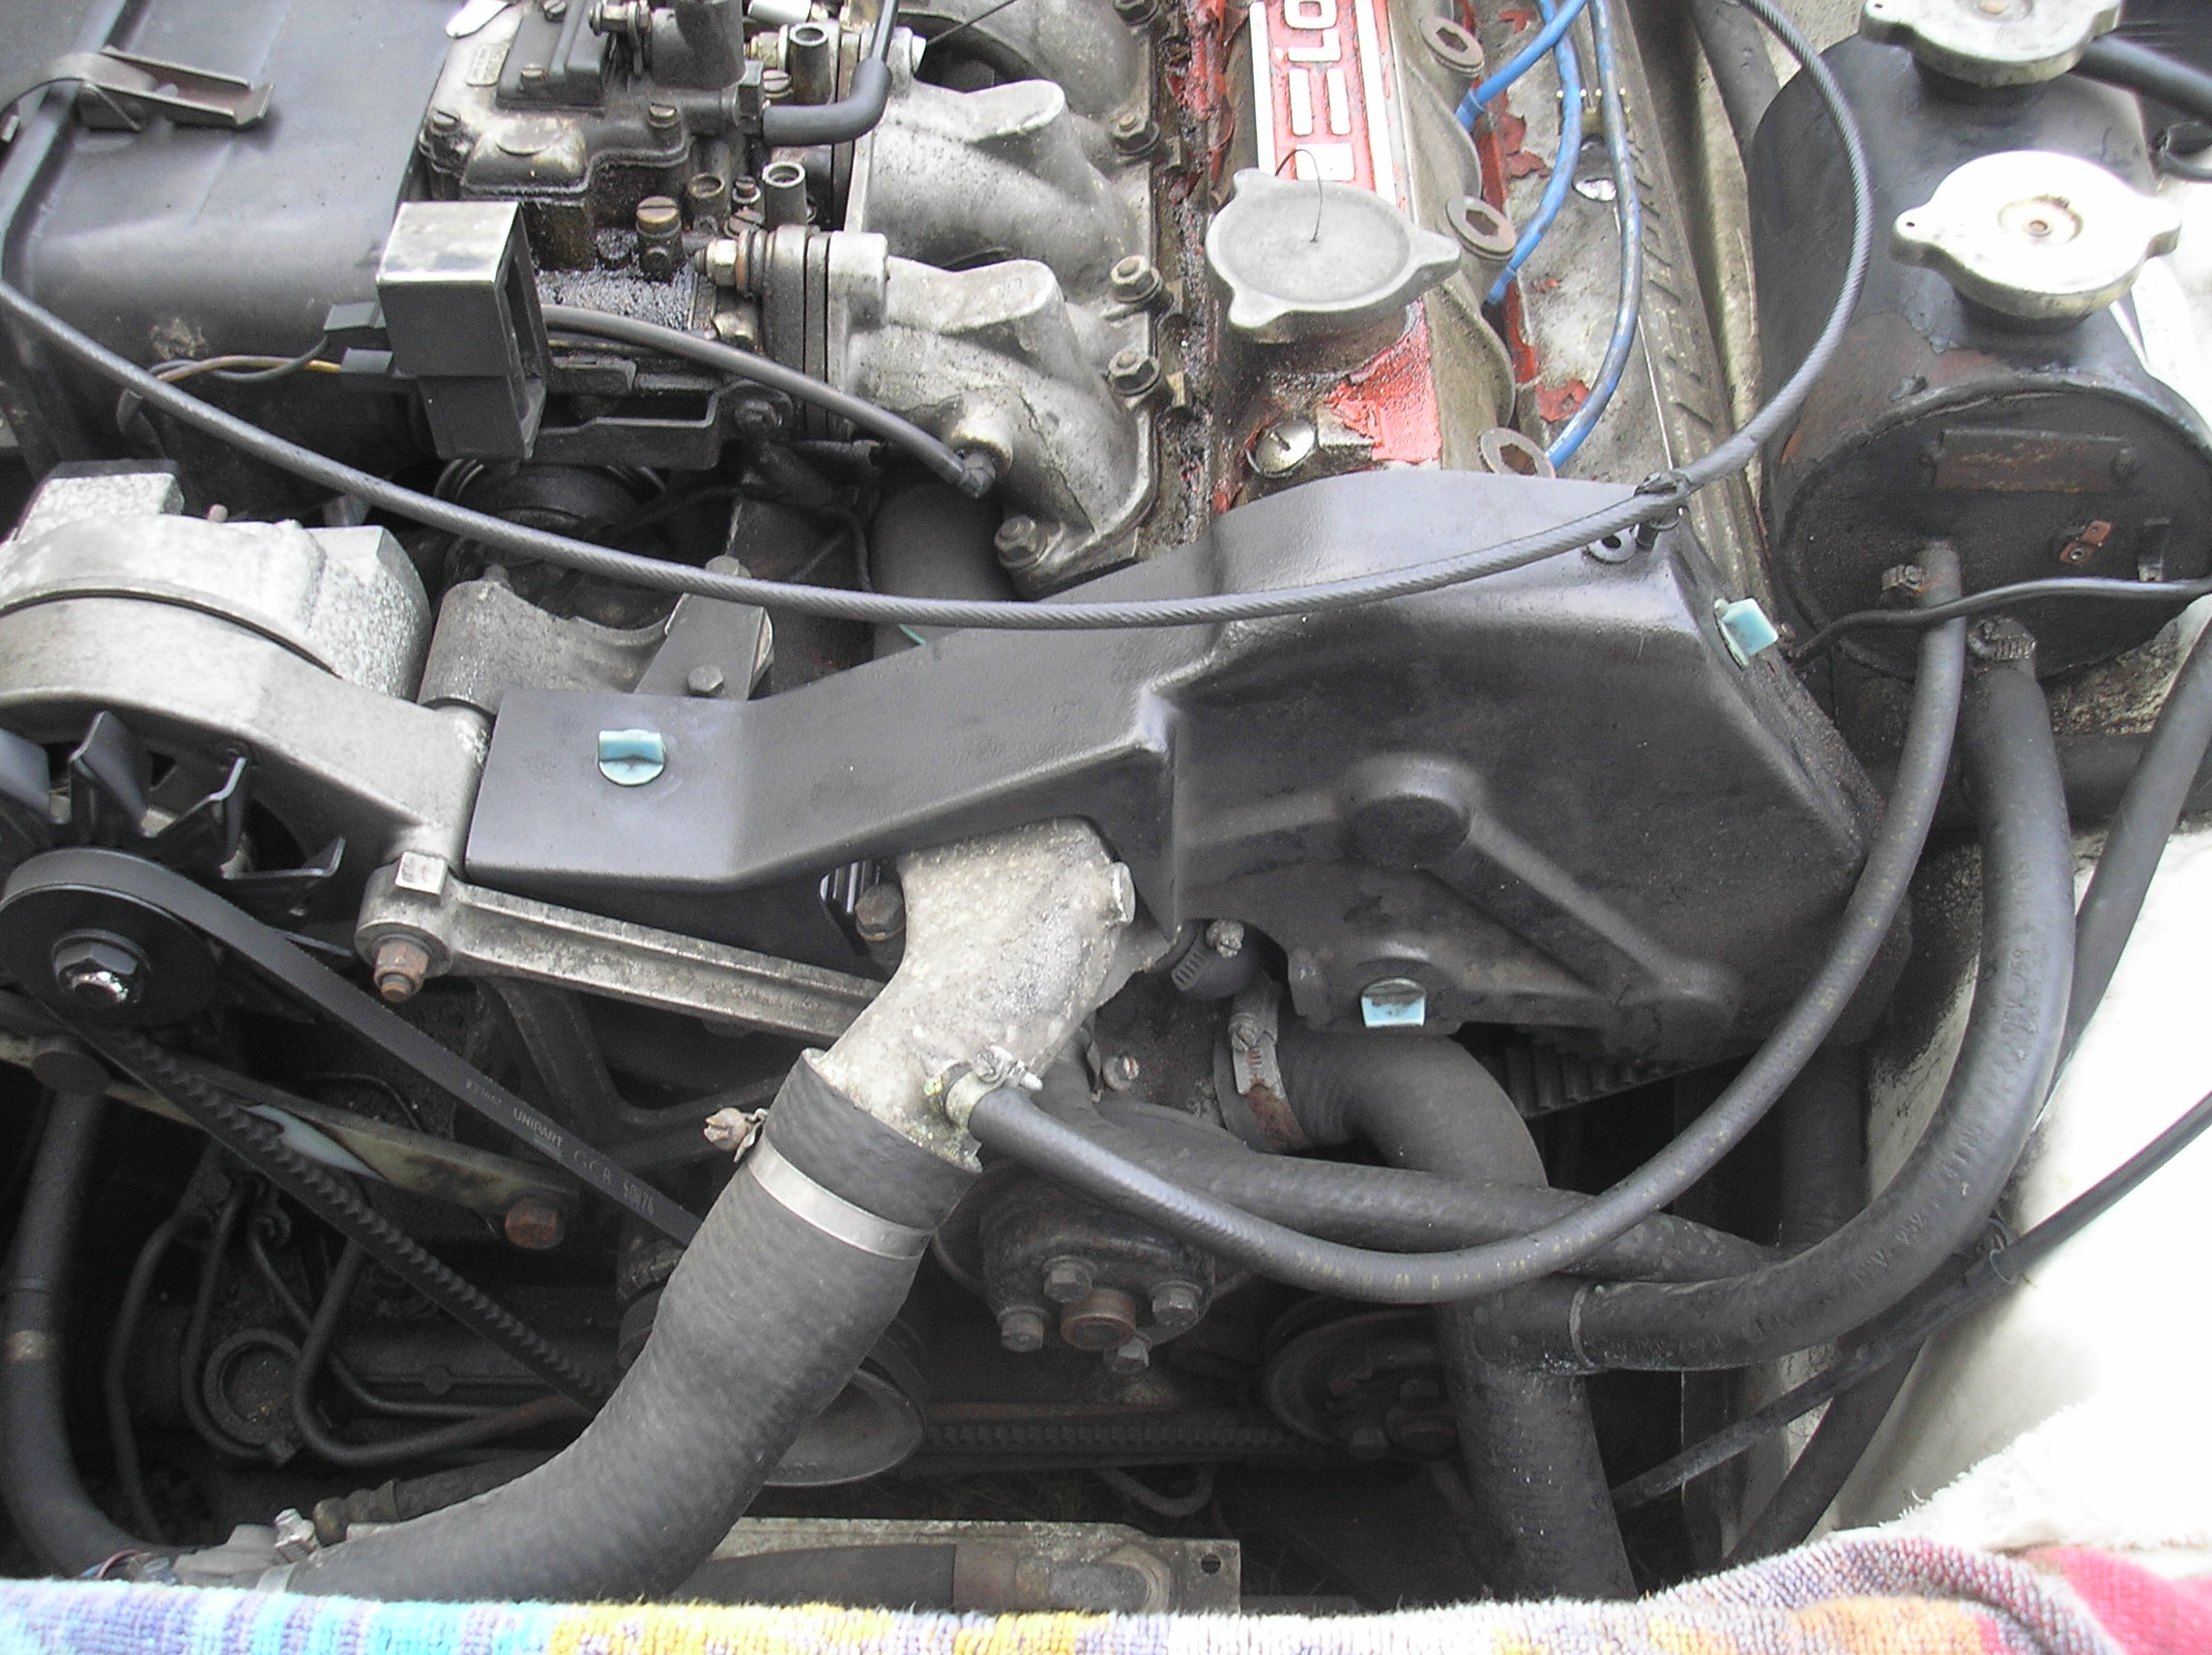
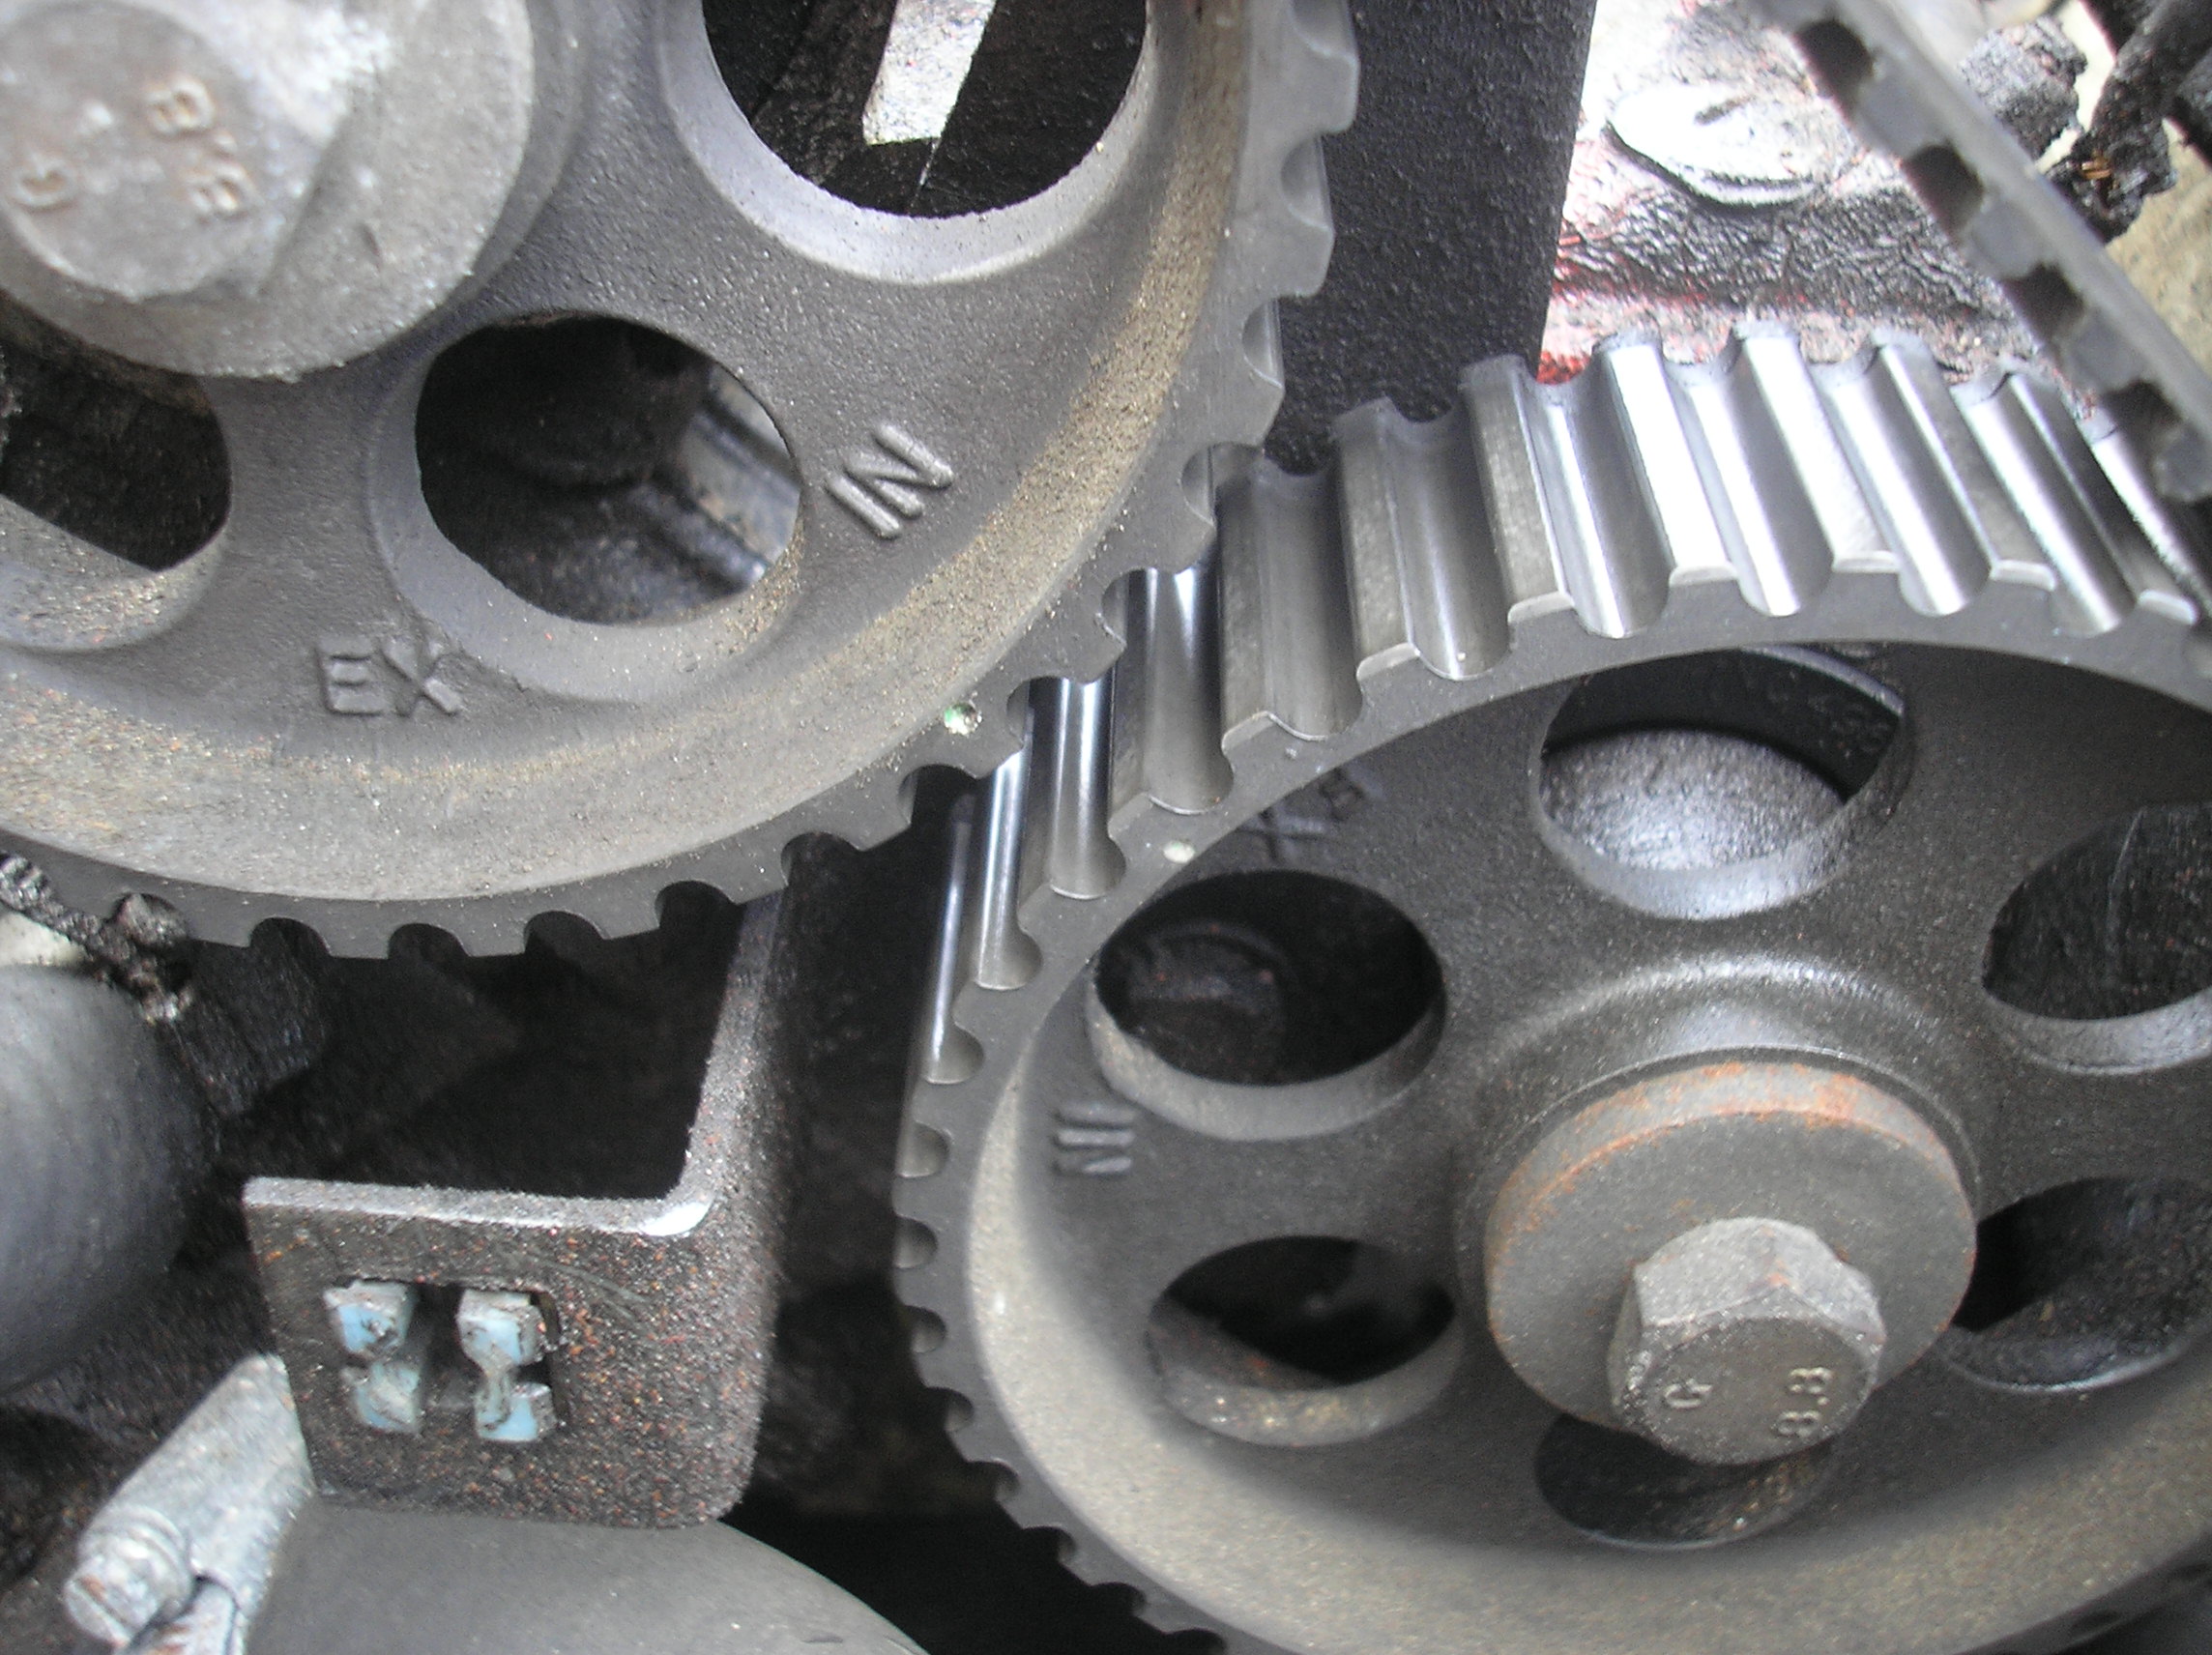
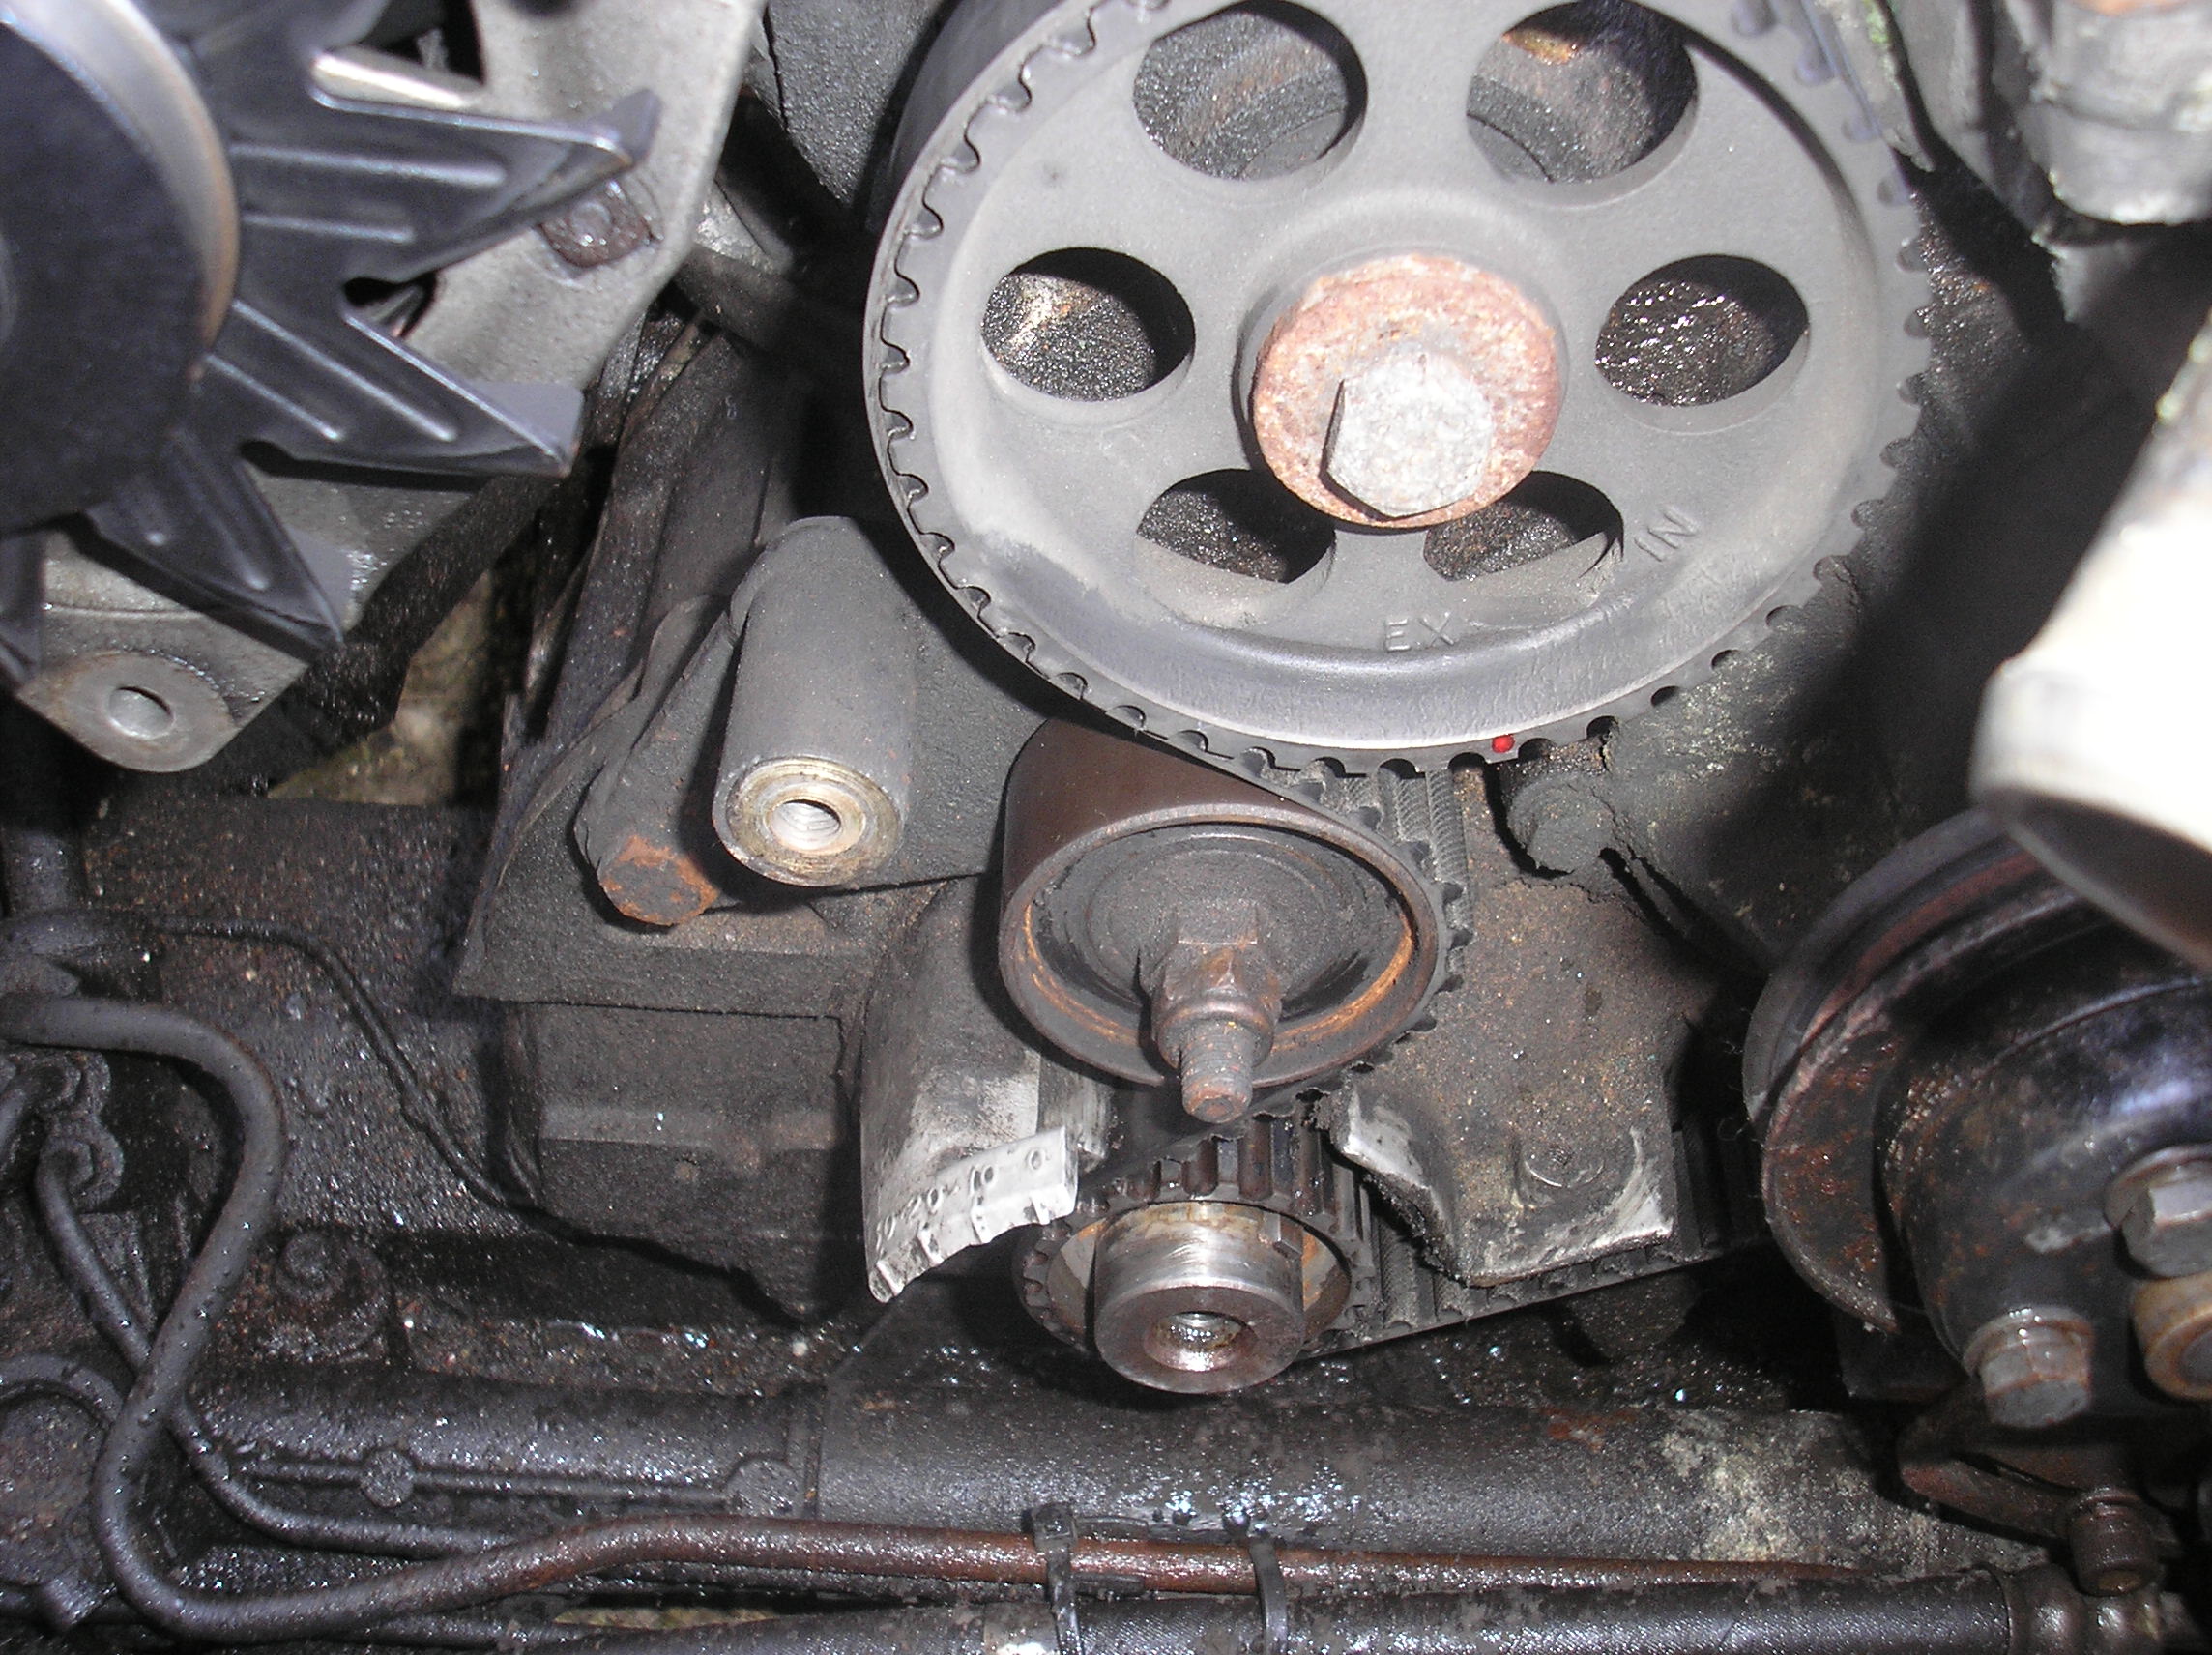
4. Align timing marks – Cam
pulleys, crank
pulley (TDC), auxiliary pulley for ignition timing and highlight with
Tippex / white paint. Count and record numbers of belt teeth between
marks – e.g. crank pulley mark to auxiliary pulley mark
(preferably between all marks for completeness). Note –
additional reference marks can be painted on as required. Fit a double
cam pulley holding tool to lock the cams in place or make sure you have
clear alignment marks for the cams.

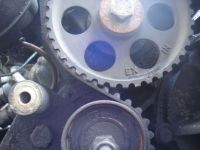
Cam pulley
marks
TDC marks
Ignition
pulley
mark*
4a. Another
suggestion for aligning the timing marks. Paint a sort of
wide stripe across the
edge of the belt to include two adjacent teeth. Now, here's the
important part; continue the paint across the edge of the cam pulley as
well. The inlet pulley is probably easiest.
For the other reference marks, paint a single stripe across all other
pulleys AND belt.
This method establishes the all important relationship between belt
and pulleys. It eliminates the need to count teeth, and you don't need
to bring the engine to TDC.
With the old belt removed, transfer all markings to the new belt and
install.
4b. Another method that has been
suggested is to cut
the old belt to leave about a 1/4 inch of belt on the car then fit the
new belt. When you have the new belt 3/4 way on cut and remove the old
belt. Using this method I would suggest that you are very, very careful
how much you slacken off the tensioner, to much and the ignition pulley
will be able to 'slip' a tooth on the old belt.
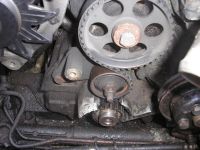
* As you can see from the above picture
on my car
the ignition pulley mark was not in the position that many websites say
it should be. This does
not matter.
The only thing that matters is that you do not move the pulley.
CAUTION: The
ignition pulley will move very easily. Take a picture, as above, before
you remove the old belt.
5. Remove lower coolant hose and drain
1-2 litres of
coolant. NB ensure that heater flap is fully open inside car (HOT
setting). Collect coolant for re-use if required.
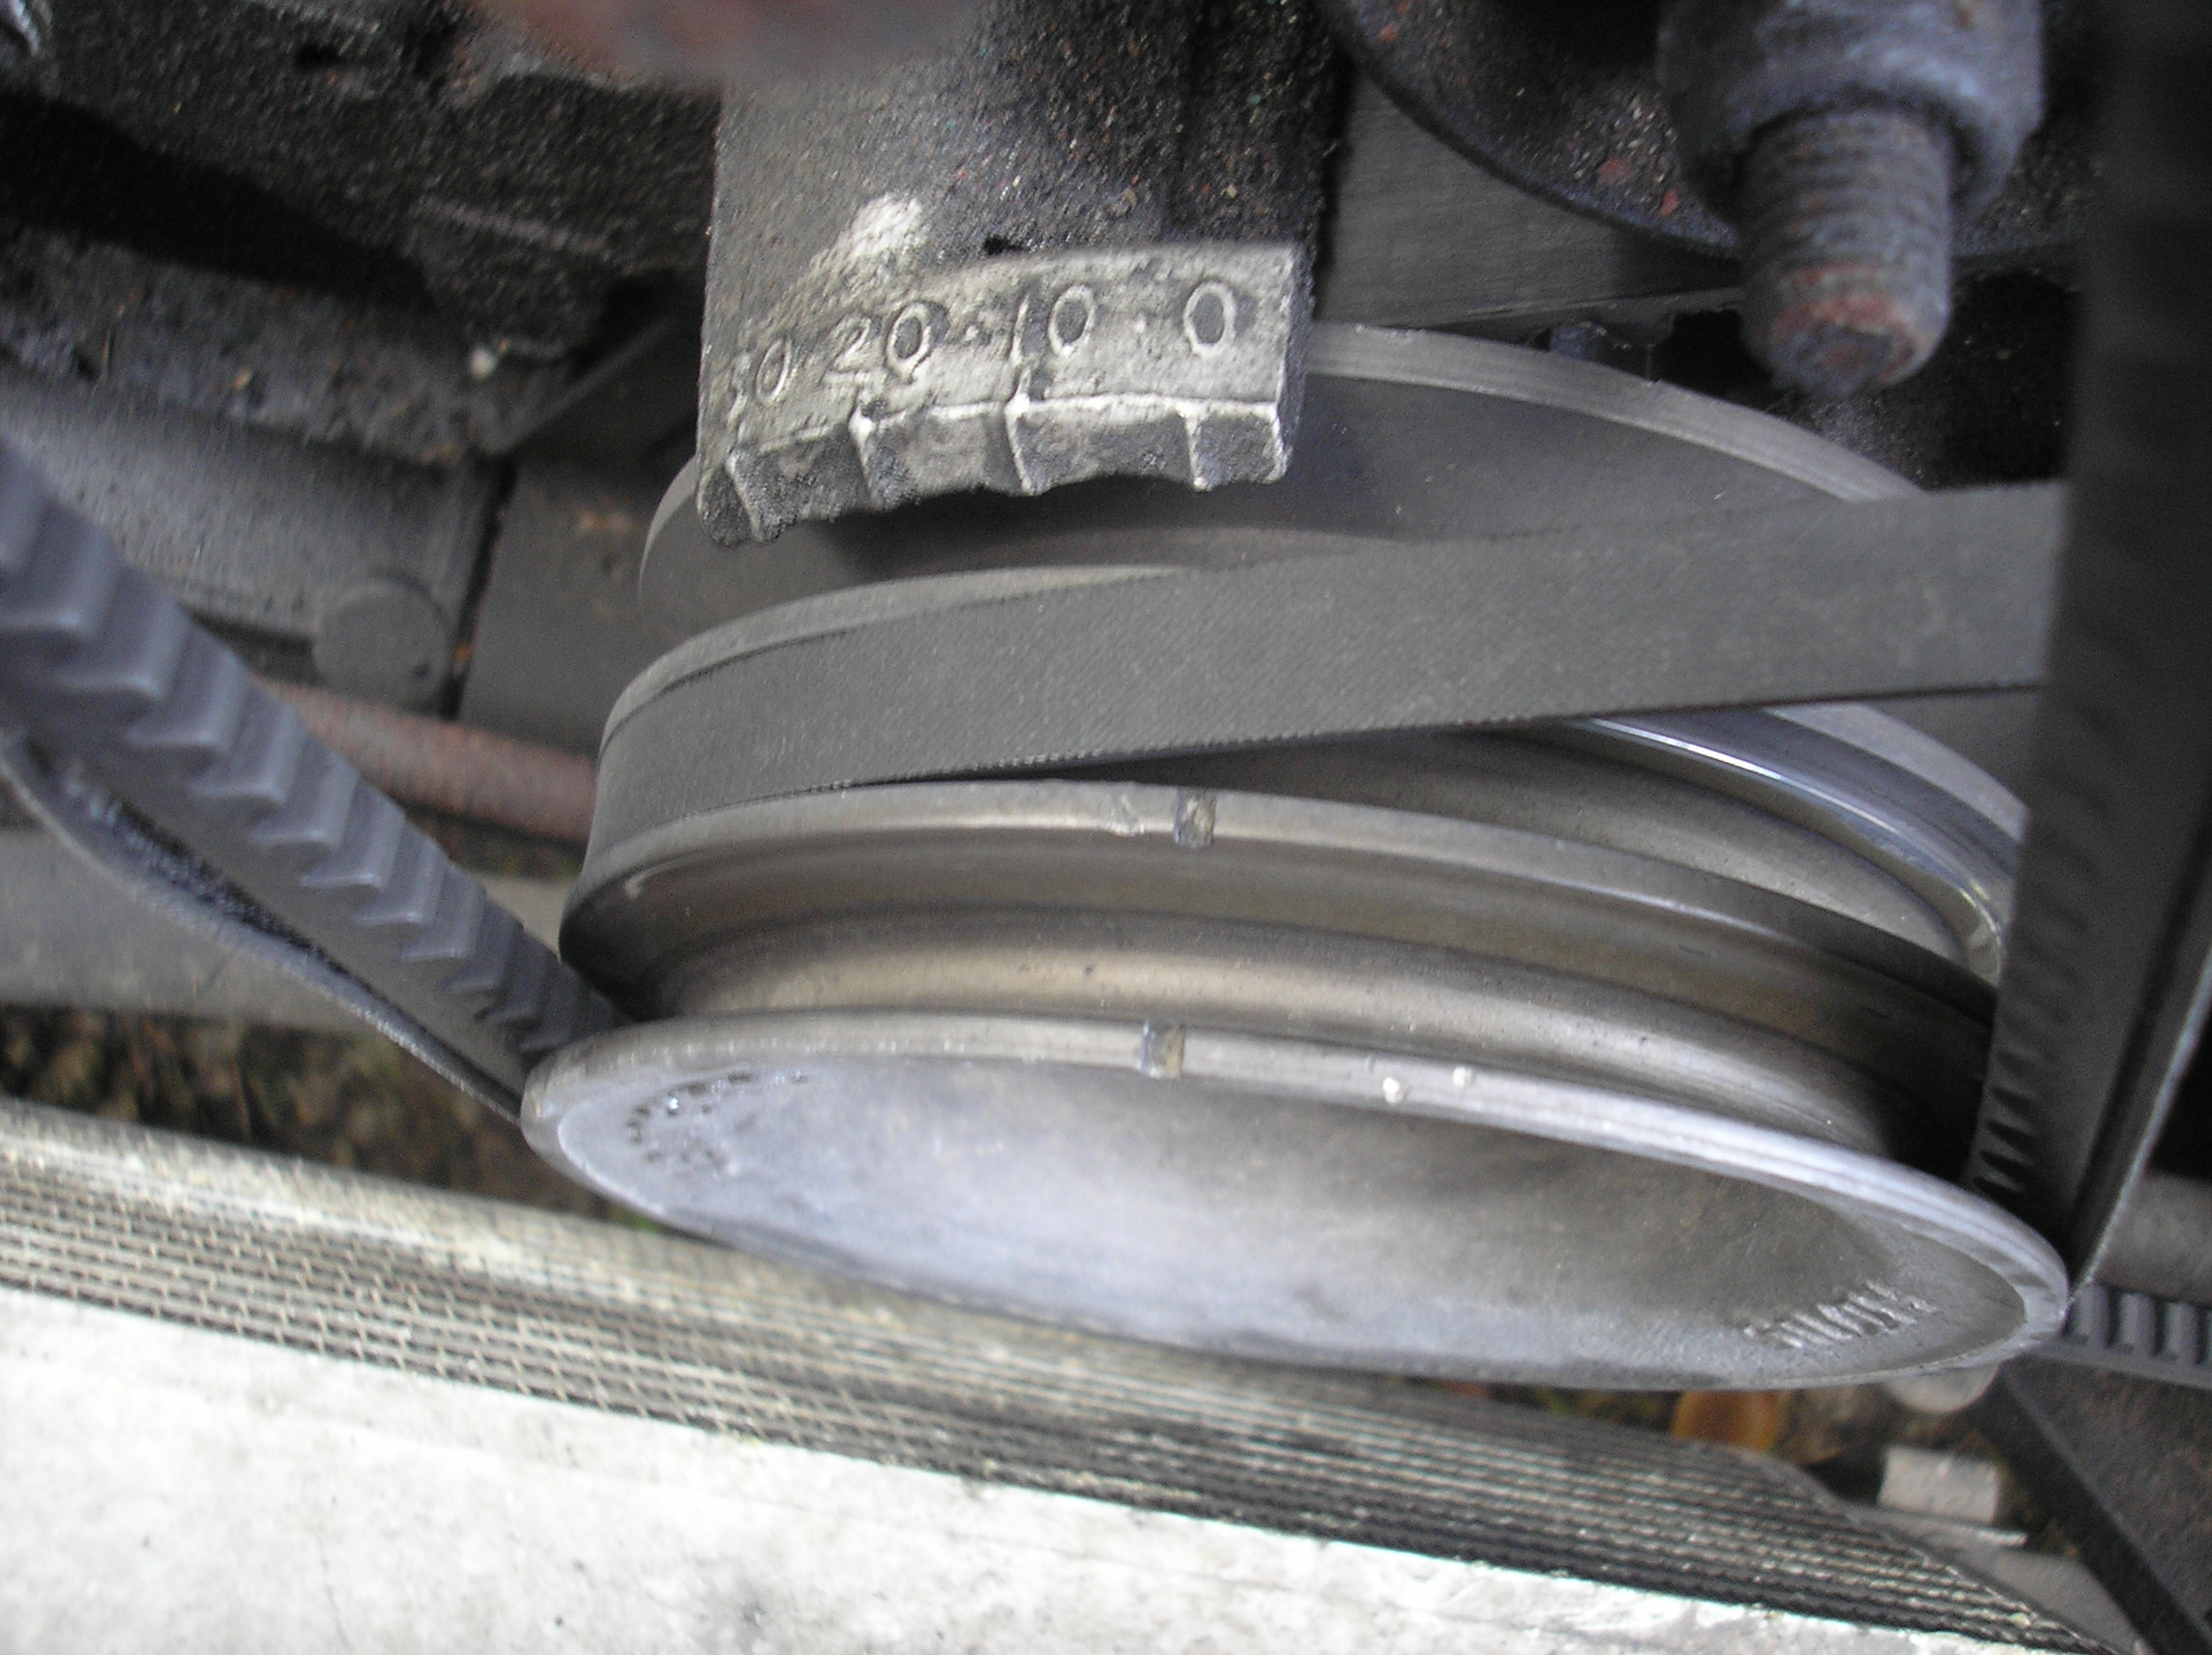
6. Check the installed tension of the
v-drive belts
for reference when installing new items. Slacken the adjuster and
remove the v-belt from the alternator. Slacken the bolts and remove
v-belt from power steering pump.
* PAS pump is slackened by the 2 allen
bolts (8mm allen key).
7. With engine in gear (e.g. 4th) slacken
retaining
bolt on crankshaft v-pulley in preparation for later removal (access to
cam belt tensioner). If the bolt is done up tight, use a large
screwdriver inserted through hole in transmission casing at lower
driver’s side (RH drive) of engine into starter ring gear to
lock
up the engine while the pulley bolt is unfastened –
don’t
forget to remove this afterwards!
8. Re-position engine if necessary to
ensure cam
pulleys, crank pulley and aux pulley are at timing marks. Ensure the
engine is in gear/transmission locked and lock the cam pulleys in place
using clamps if you can (or borrow a friend to help keep their
alignment). CARE – engine must not rotate from this point on
in
order to avoid bent valves!!
9. Remove top radiator hose and any other
pipework needed to access the cam belt /tensioner, etcetera.
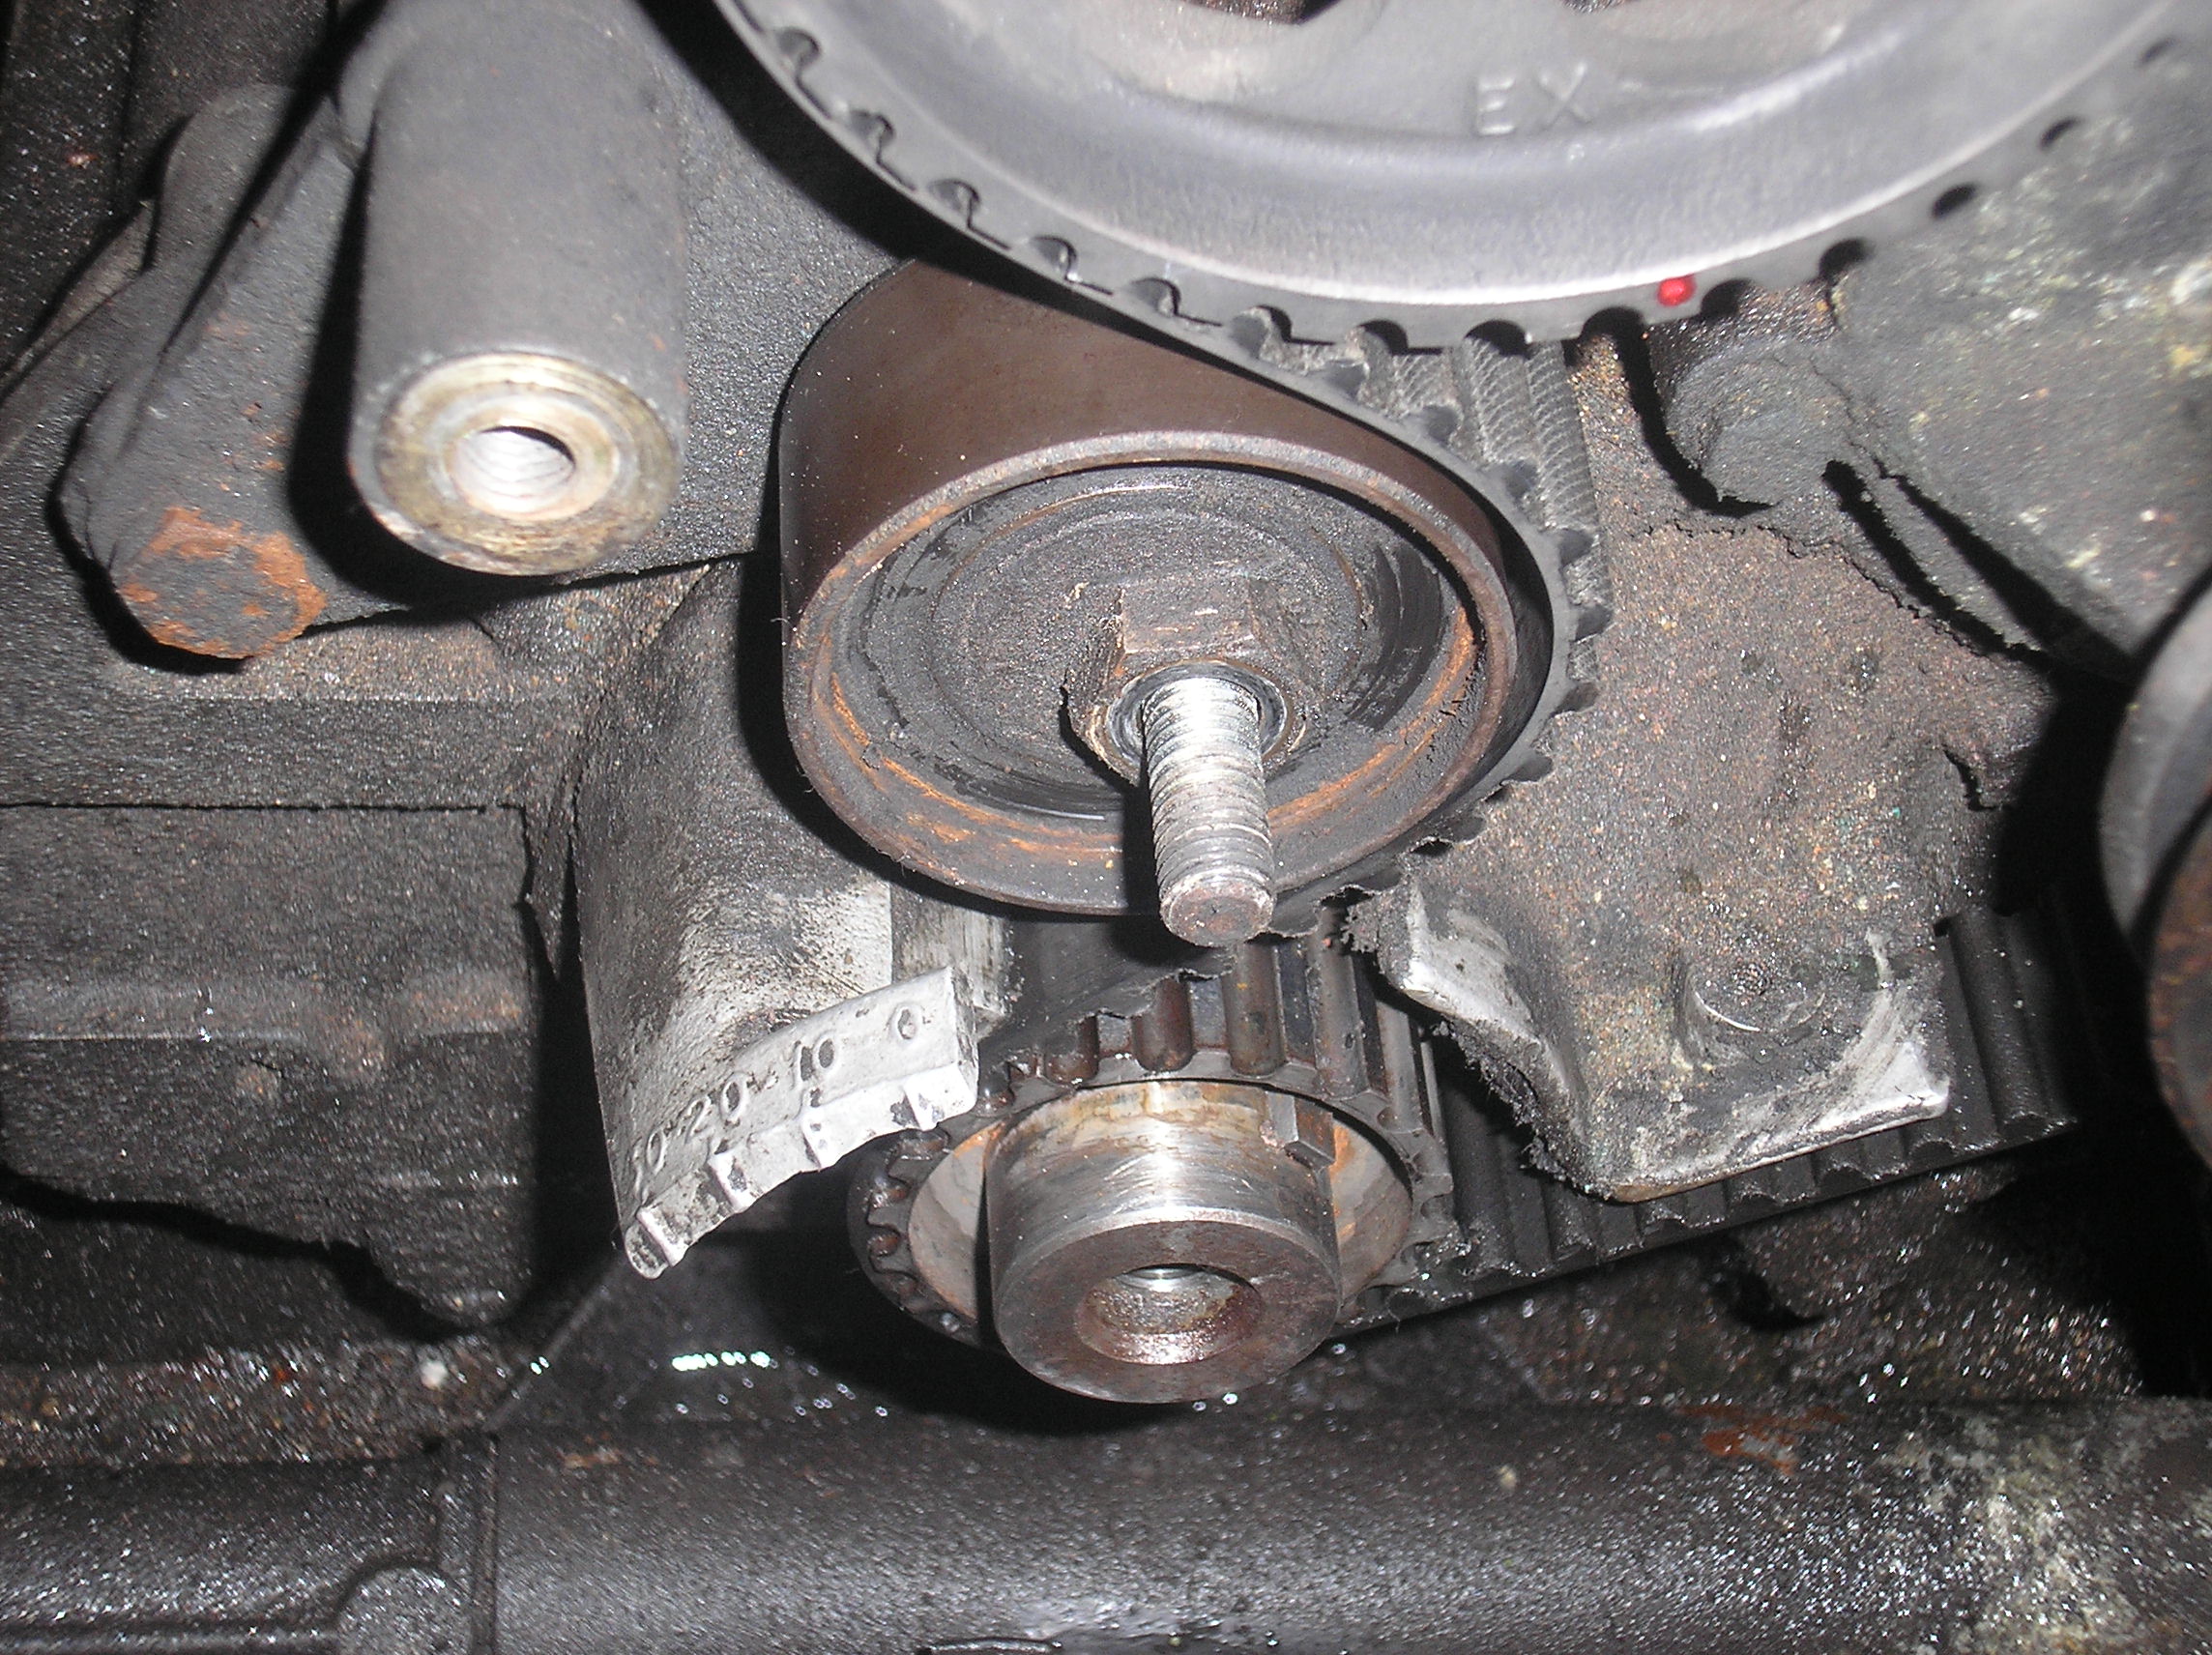
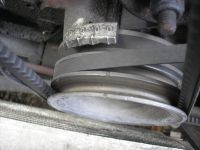
10. Remove the crank v-pulley to access
the eccentric
tensioner. This can be difficult and may require a pulling tool
–
there is not much room between the pulley and oil cooler. Slacken the
cam belt tensioner bolt and note the orientation of the tensioner for
re-installation (it can be adjusted eccentrically in two directions and
only one is correct – with the eccentric hole towards the
top).
Remove the tensioner and install a new bearing, pressing off the old
one in a vice.
Crank
pulley
off
Tensioner
loose
11. Remove the cam belt and carefully
replace with a
new item, checking for correct orientation, exact match (size, tooth
profile and number of teeth) and ensuring same relative position
– i.e. same number of teeth between key marks (crank
pulley/aux
pulley, exhaust pulley/crank, etc) as originally.
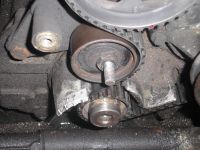
12. Re-install the tensioner and adjust
it to tension
the new cam belt. Note that the eccentric adjuster can swing against
the belt in two different directions and should be installed so that
tension tightens the bolt, i.e. by swinging anticlockwise as
viewed
from engine front. Tension is correct when there is nominally
85-90° of finger twist about a vertical axis between the aux
and
inlet cam pulleys. Check that all the timing marks still align
–
ESPECIALLY ignition timing - and correct any if needed.
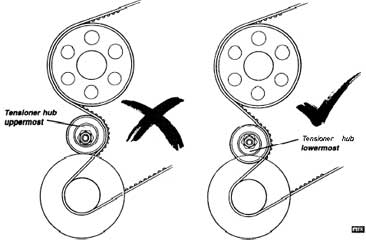
How the tensioner should be.
I found the above picture on the internet, can't
remember,
where so if the owner would contact me I will credit them or remove it.
13. If timing marks are correctly
aligned, remove the
cam pulley clamps and place the transmission in neutral (or remove
screwdriver). Replace the crank v-pulley if needed for the alignment
check and tighten its bolt firmly. Turn the engine clockwise by hand
gently and check the belt tension at 1/3 turn intervals for at least 2
full revolutions. If excess resistance is encountered return the engine
in the reverse direction to TDC and re-check timing mark alignments.
Check for mis-alignment of the belt on the pulleys. ENSURE that the
tensioner is correctly tightened – if this slips, the damage
caused can be considerable.
14. If alignments are correct and the
tension
acceptable, replace the crank v-pulley (if not done already) and
re-install or replace v-belts. Ensure that V belts are correctly
tensioned (i.e. pretty tight). While you are down there, check that the
bolts holding the PAS pump are secure – if not, remedy this
promptly as it can cause expensive problems later.
* My PAS
pump bracket was loose
and one bolt was missing. They are very difficult to get at but it is a
must do job.
Two allen bolts at the front which you can't see use 6mm
allen
key, the two nuts at the back are 13mm spanner size.
15. Replace the coolant hoses, check that
they seal
well and replenish the coolant. If using new coolant, check that the
anti-freeze is alloy compatible and dilute (1:1) with de-ionised water.
Re-install / tighten spark plugs if they were loosened or removed.
16. Replace the lower and then upper
timing belt
guards. Ensure that the timing belt passes them freely when turned by
hand (i.e. no fouling or abrasion).
17. Start the engine (carefully) and
listen to the
cam belt. If there is excessive noise the belt tension is a probable
cause and will need to be re-checked. Basically an over-tight belt will
whine and a slack belt will flap or flutter on over-run. Let the engine
run for ~ 2 mins. Stop the engine and re-check belt tension. Also check
for minor coolant leaks from the hose unions and tighten them if
needed. If all is OK, replace the other components – air
inlet
hose (cable tie this in place in its brackets), bonnet and so forth.
18. Check for missing / loose components,
stray tools
and top up the coolant. Tidy away other materials. Job done.
Original written by chrisw2811
with additions by GavinTaylor
& myself.
Find us and a lot more very helpfull folk at the
excellent Lotus
Excel forum
NB. The usual disclaimers apply - ie if it goes wrong you can't blame
anyone but yourself.
...................................................................................................................................